Canri for Teams
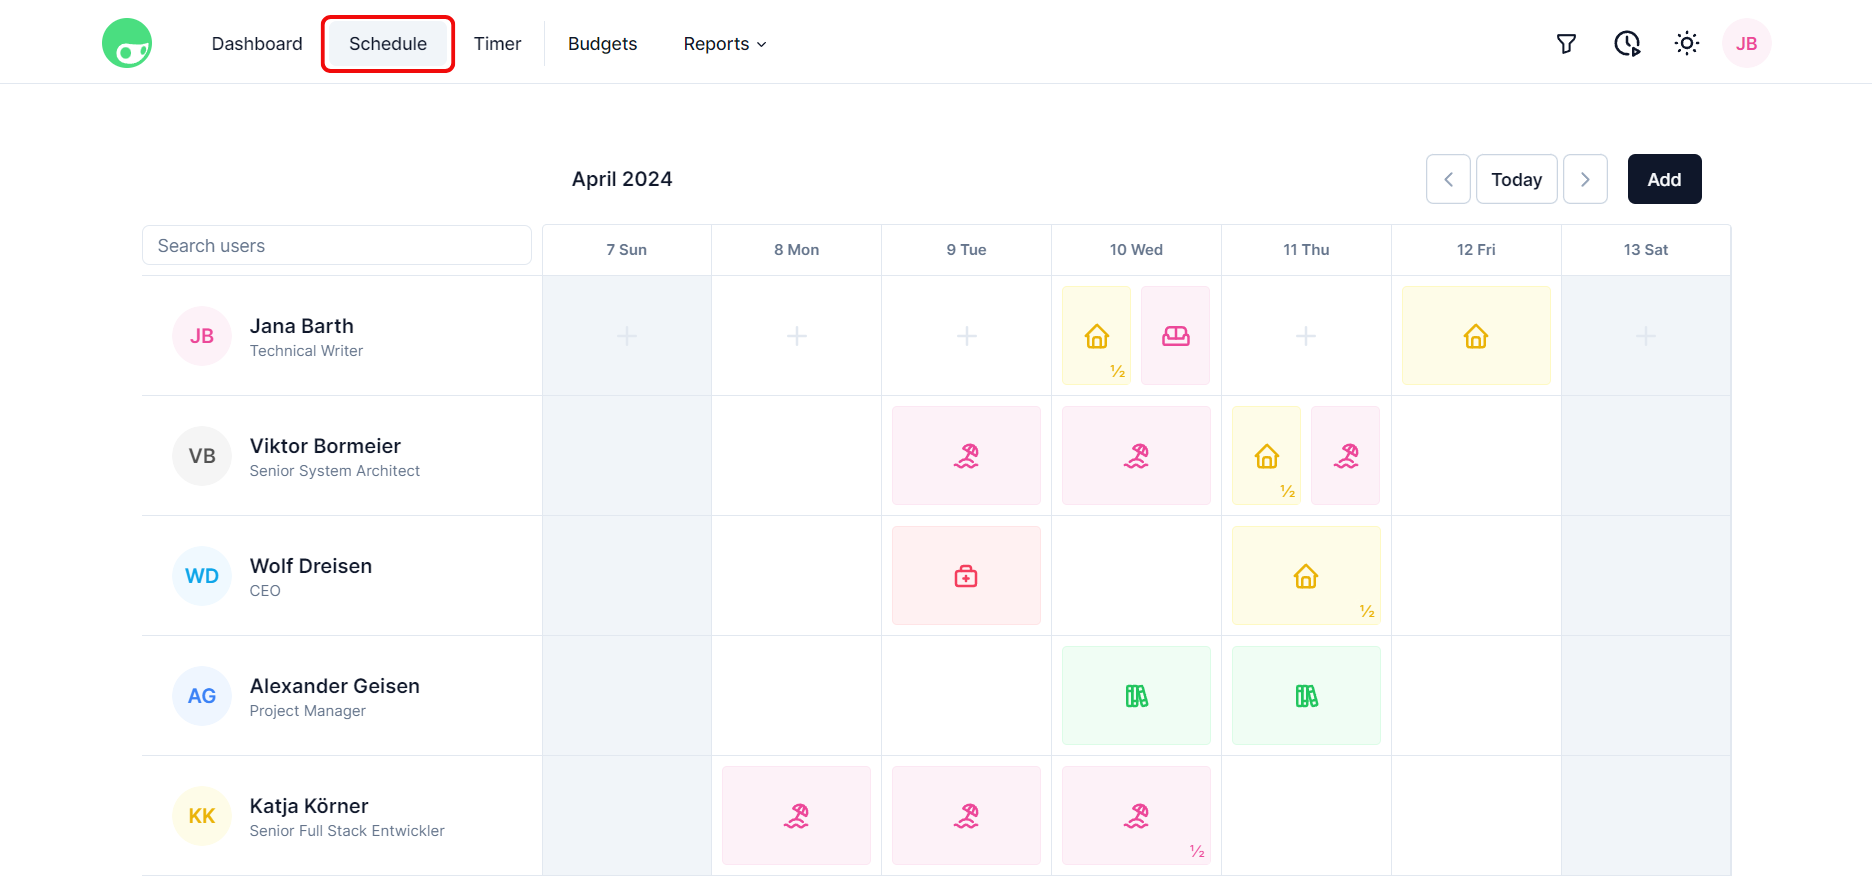
Schedule
The schedule gives you a calendar-like overview of your own and your team's week ahead. This enables you to quickly see how your colleagues have planned their week, who would be available for coworking and who is working from home or is on vacation or sick leave.
You can furthermore view the personal schedules not only of yourself but also of your colleagues, create, edit and delete schedule entries on the fly and view detailed notes about schedule entries in an additional widget.
The schedule is structured similarly to a weekly calendar with the days of the week, starting with Sunday, shown in the top row, and the team members, starting with yourself, shown at the left in the sidebar. Each row in the schedule equals the weekly schedule of a team member and each column equals the schedule for a specific day.
Just like in the dashboard section, global filtering options can be applied to the schedule to trim down the data shown to you. Additionally, you can use a search function to search for specific users and include them in your overview.
Go Forward/Backward
You can easily go forward and backward in the schedule by using the arrow buttons in the top bar to parse through the weeks and months. The current month and year are always shown on the left side of the top bar.
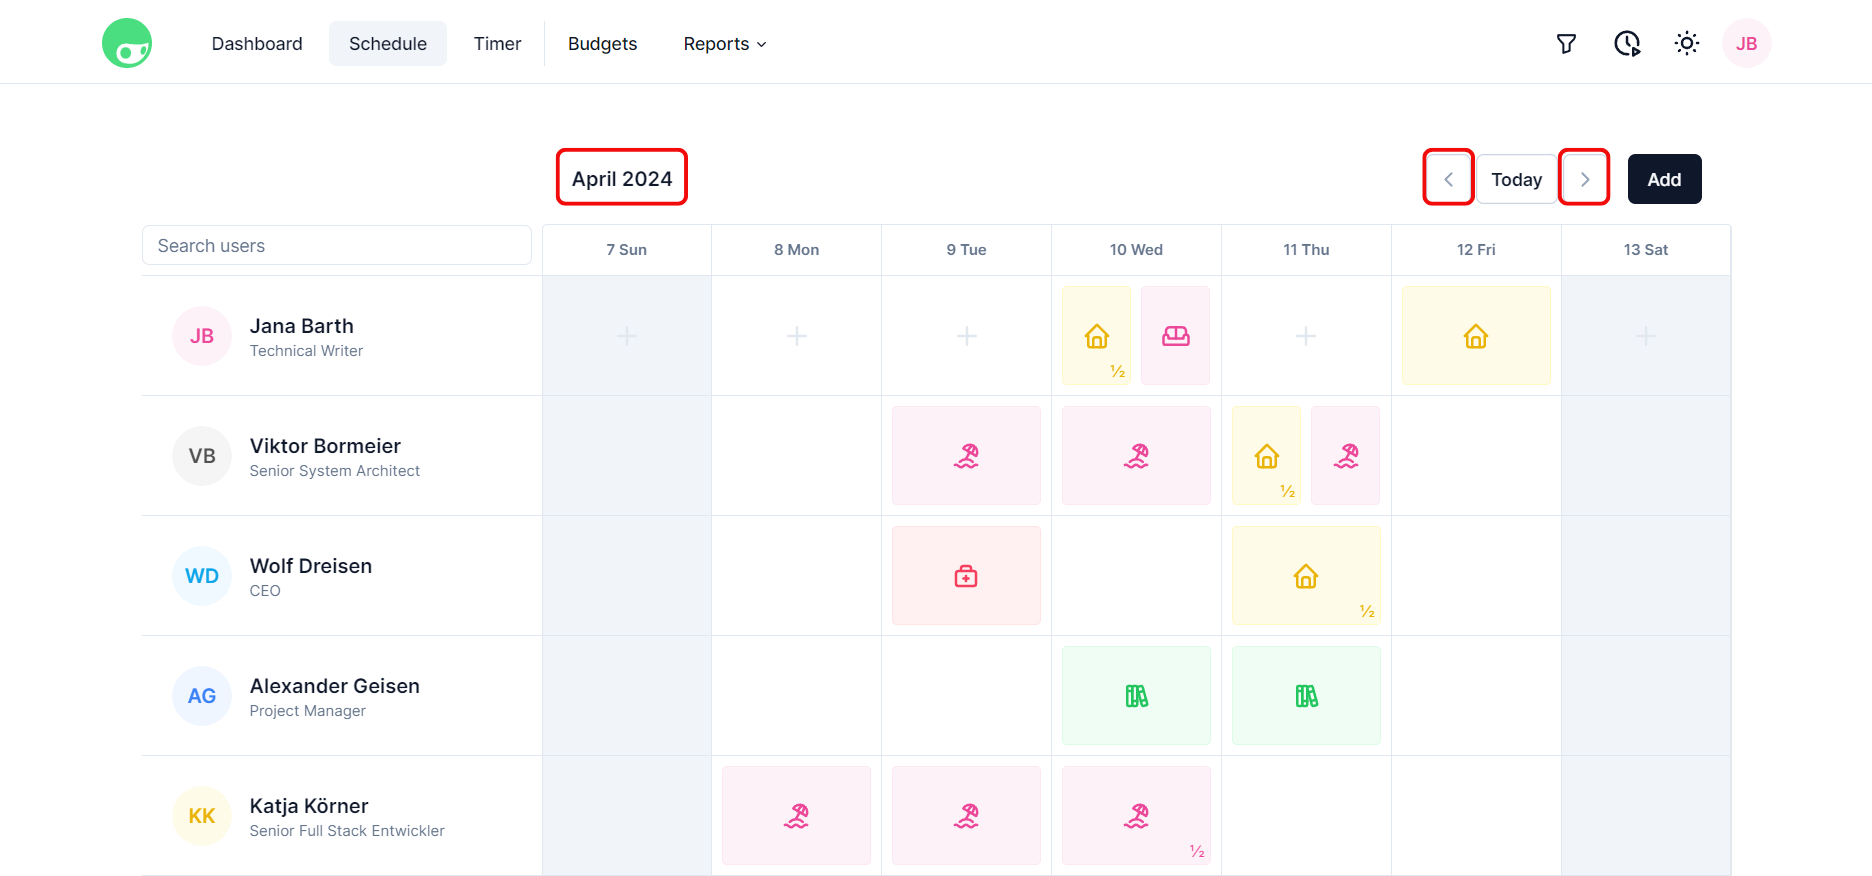
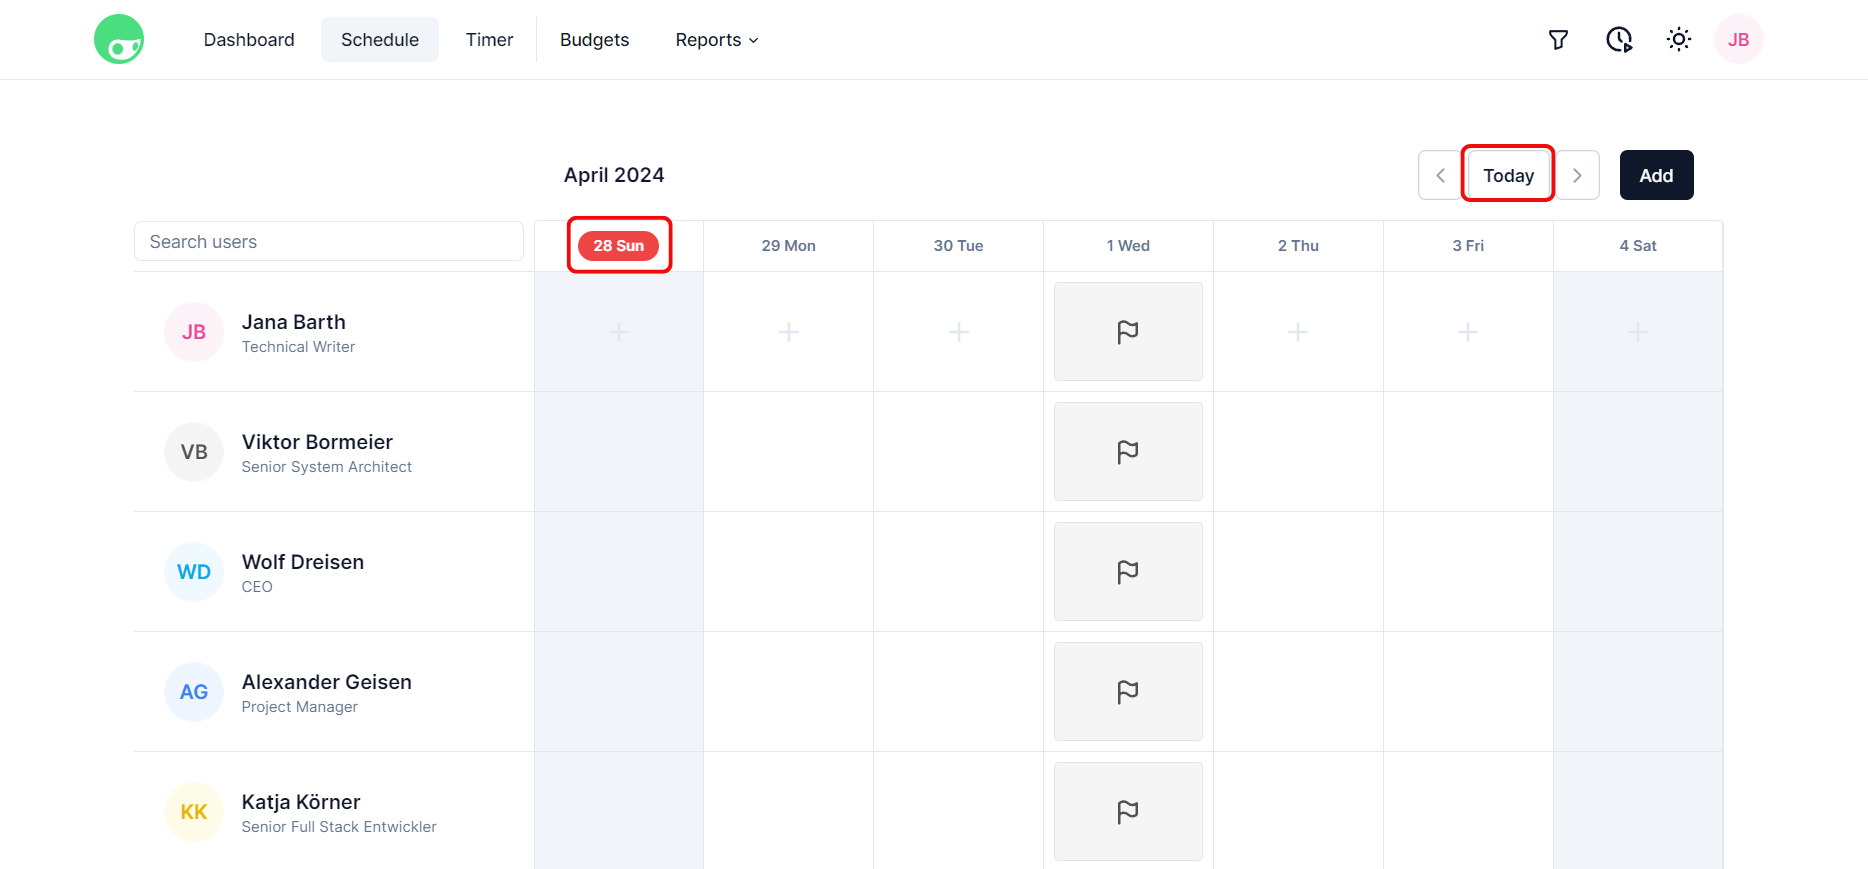
By clicking on "Today" in the top bar you can jump directly to the current week and day in the schedule. The current day will be marked in red in the timeline of the schedule.
Search Users
Unless global filtering options are enabled, all currently configured users are shown in the sidebar of the schedule. If you want to search for the schedule of a specific team member, you can use the search bar to trim down the selection of users displayed in the schedule. This lets you find the schedules of certain team members quickly and without hassle.
The search function works by pattern matching so that the input pattern will be matched with all corresponding user names.
Switch to Personal Schedule
From the main weekly schedule, you can easily switch to the personal schedule of yourself and of all other team members. To do so, click on the name of the user in the left sidebar and you will be taken to their respective schedule.
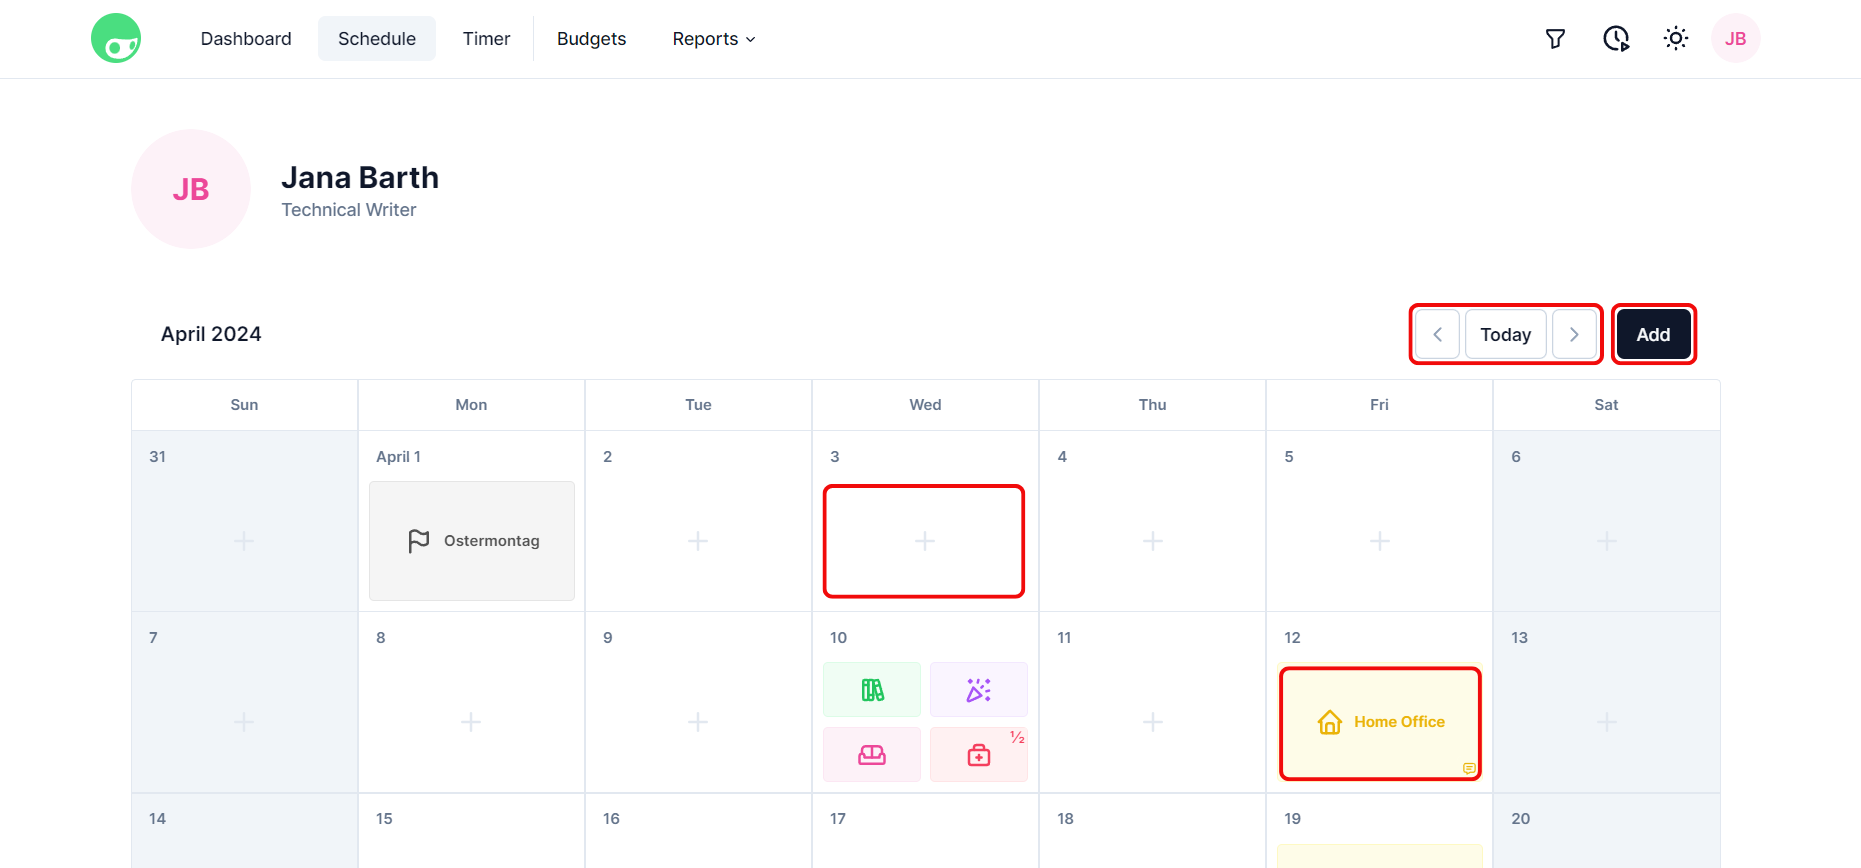
Personal Monthly Calendar
The personal schedule features a monthly calendar view. You can go forward and backward in the calendar by using the arrow buttons in the top bar. By clicking on the Today button you can also jump to the current day and month, just like in the weekly schedule.
In your own personal schedule, it is possible to add new schedule entries by clicking on the Add button in the top right corner or by clicking on any day in the calendar.
You can also view details of existing entries, edit them or delete them by clicking on the entries themselves. This option isn't available if you're in the calendar of another team member.
Monthly Calendar of Other Users
While viewing the personal schedule of another user, your options are limited unless you're an admin. You cannot create new schedule entries or edit or delete existing ones.
However, you can go forward and backward in time or jump to the current day and month by clicking on the Today button like within your own calendar.
You can also view details about existing schedule entries added by other users by clicking on the entry in the schedule.
View, Edit & Delete Schedule Entries
View Schedule Entry Details
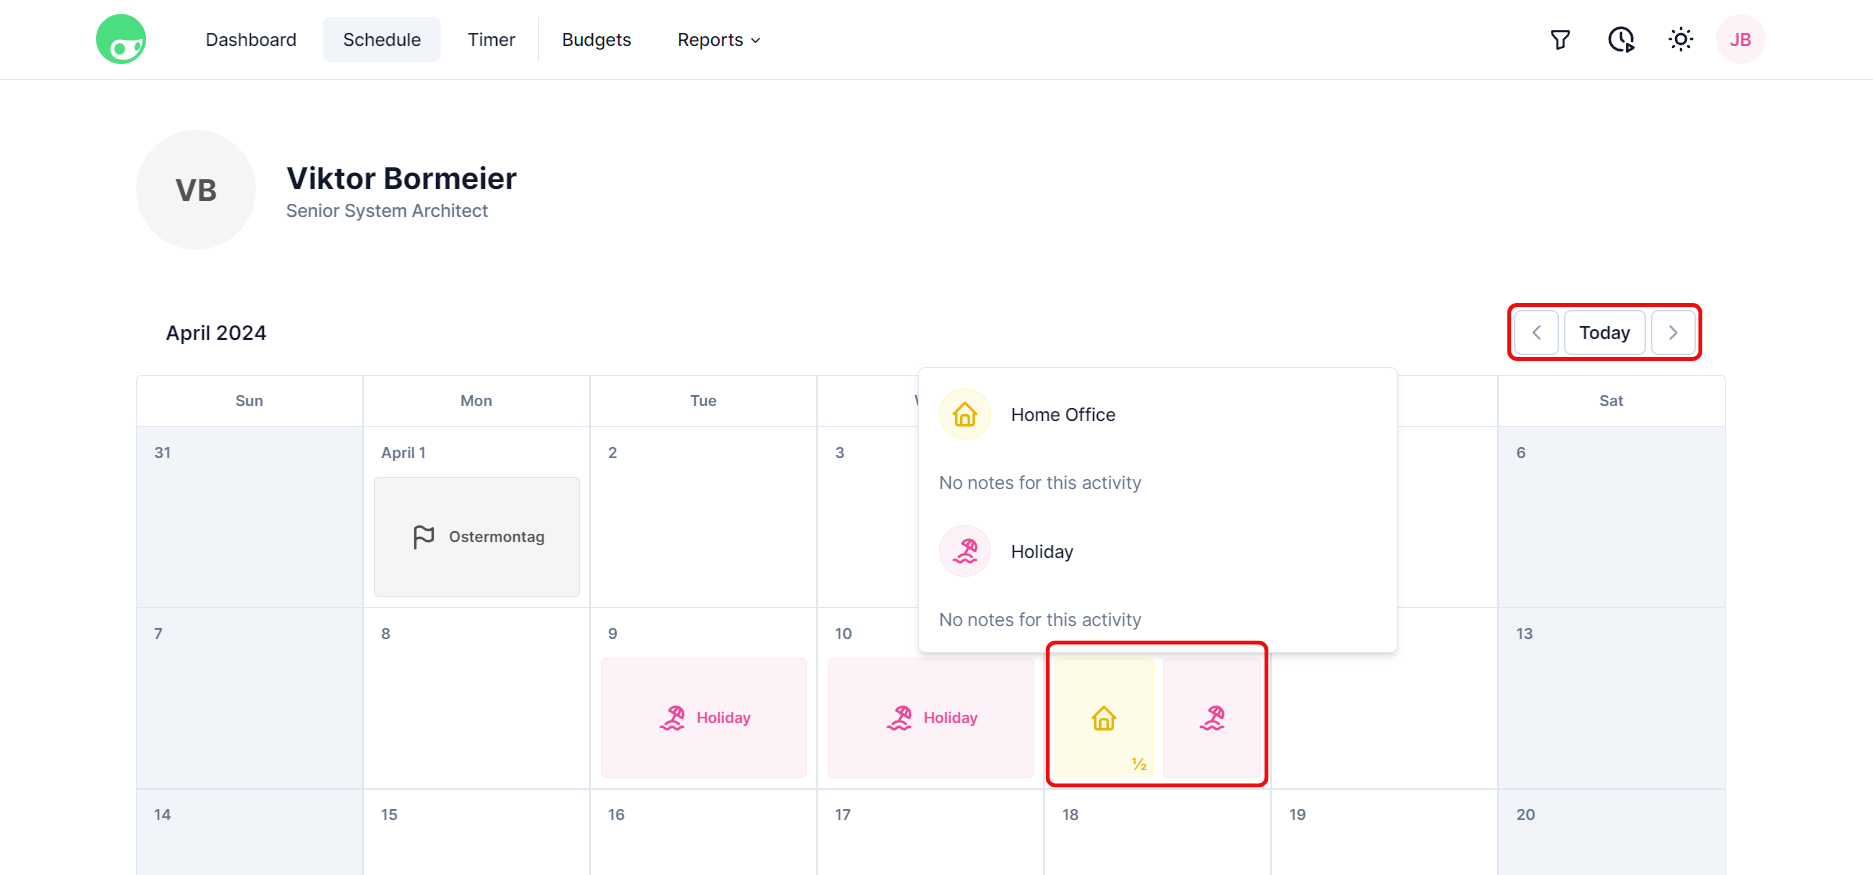
It is easy to view details about an existing schedule entry.
Just click on the schedule entry in the schedule and a widget will pop up showing additional information about the entry such as any notes you might have added to it. If there are multiple entries for one day they will be shown in the same widget. Viewing the detail widget is possible both in the main weekly schedule and in your personal calendar.
You can also view details about schedule entries from other team members by clicking on their entries both in the main schedule and in their calendar view. Adding notes to your schedule entries is therefore a great option to forward any additional information to your team members such as why you might not be present at work or whom they should refer to if they have any issues in the meantime.
Edit Schedule Entry
In the schedule entry detail widget, it is also possible to edit existing schedule entries.
To edit details about a specific entry, click on the entry in the main schedule view or on your personal calendar and then click on the pen icon beside the entry you would like to edit.
You will be taken to the edit screen where you can change the type of the entry, enable or disable that it is supposed to be a half-day event or add any additional notes. If you are finished, click on "Update" to make the changes permanent.
Delete Schedule Entry
To delete an existing schedule entry, click on the schedule entry to open the detail widget and then click on the bin icon beside the entry you would like to delete.
Confirm your action by clicking on "Delete" and the entry will be deleted permanently in your schedule.
You should know!
If you are a simple user, you can edit and delete your own schedule entries, but not those of other users.
Add New Schedule Entry
There are two different ways you can add new schedule entries to your schedule:
- Add Button: Click on the "Add" button in the top menu either in the main schedule or in your personal schedule.
- Plus Icon: You can also directly add new schedule entries to certain days by clicking on the plus icon displayed in the schedule itself. If there are already existing entries during a day, it is still possible to add entries this way, you just have to click on the day itself and can carry out the same action.
You should know!
If you are a simple user, you can add schedule entries to your own schedule, but not to those of other users.
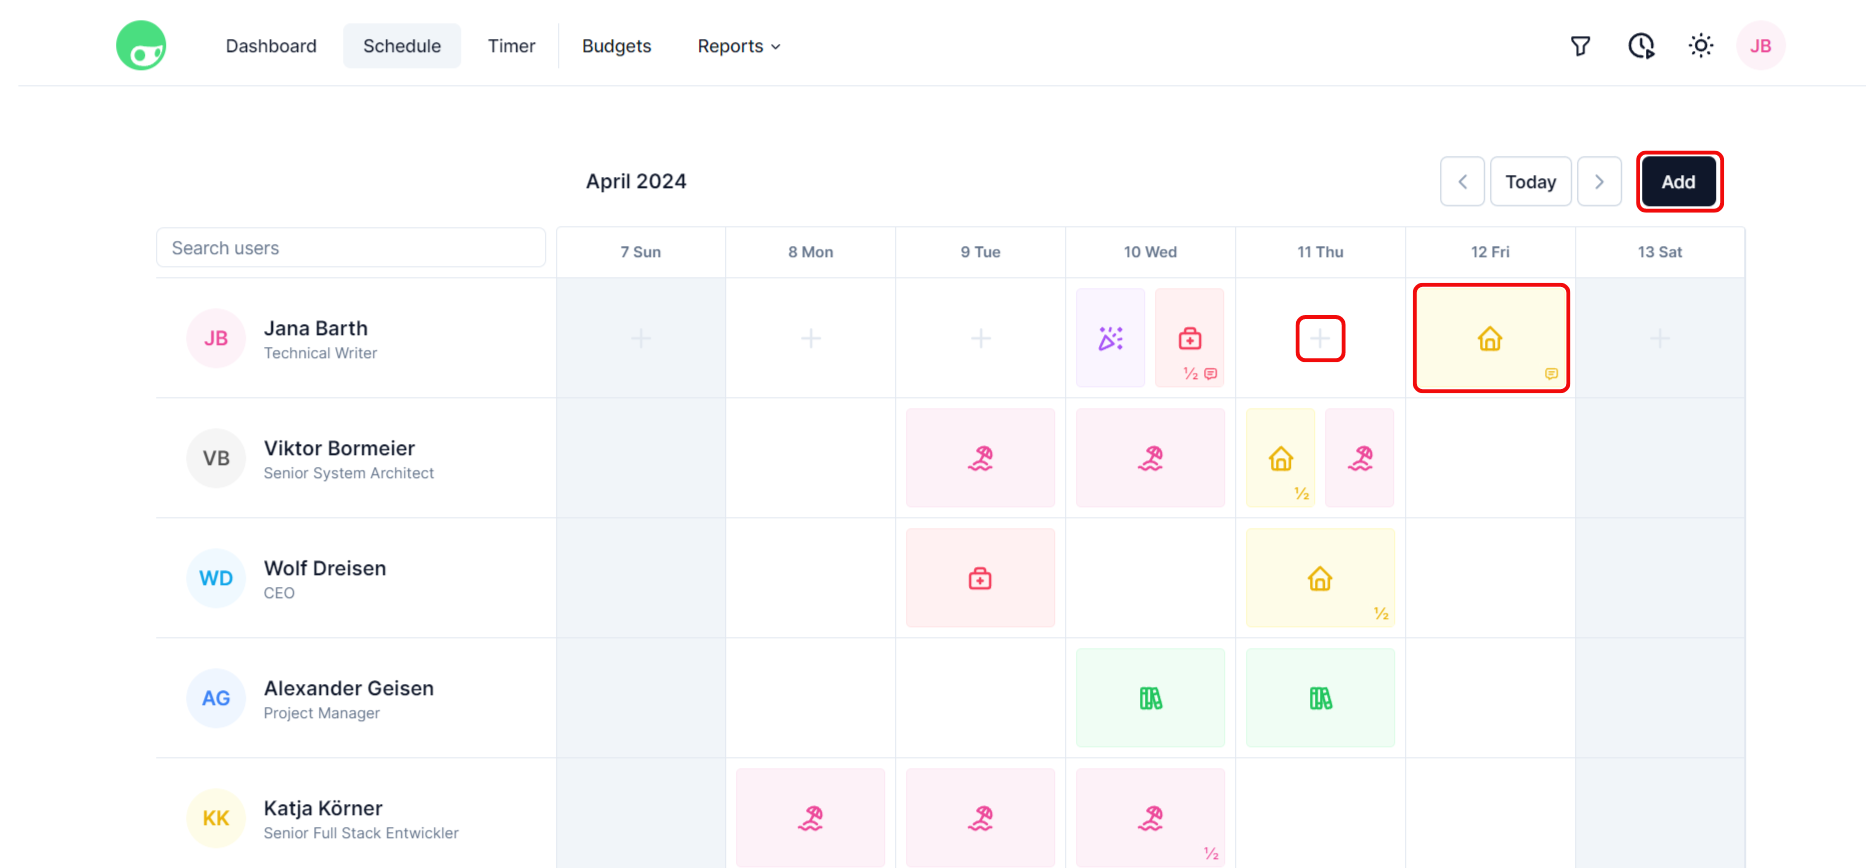
While adding a new schedule entry, you can configure the following details:
- Type: Choose the type of the entry, for example, "Home Office" for working from home, "Education" for taking a class, or "Business Travel" for being out of office due to traveling for business reasons. The available entry types can be configured by admin users in your Canri instance.
- Day: Choose the day the entry should be on. You can select multiple days, even across different weeks and months, to create multiple entries at once, for example, if you plan on being on vacation for several weeks at once.
- Half Day: Set whether the entry should be a half-day event, for example, if you plan on only working half the day from home.
- Notes: In an empty text area, you can add any additional notes to the entry which other team members will be able to view in your schedule. This is a great way to pass on important information to the team.
Filtering Schedule Data
Just like in the dashboard section, you can also filter the available data in the schedule by setting global filters.
Available filtering options are:
- Area: Filter by the department of your company like Sales, Management or Development.
- Country: Filter by country of your office location like Germany, the US or India.
- Location: Filter by concrete office location like Berlin, Munich or London.
Setting filters will only show specific users in the main schedule, for example, colleagues of a certain department, from a certain country or working in a certain office. By using the global filters you can therefore create a schedule only containing members from your immediate team if you're working in a large company.
You should know!
The configured filters are not only applied to the schedule but to the dashboard, budget and report sections as well.