Canri for Teams
Timer
The timer lets you create time bookings for your daily work so that you can track what you've been working on and when you've been working on it.
You can view already created bookings in a timeline-like view on a weekly base or in a calendar-like view on a monthly base. This provides you with a concrete overview of your work times. In addition, you can easily see which days you have missed when tracking your work hours.
There are multiple ways to add new time bookings, including tracking your time ad hoc, creating bookings manually via selecting a budget or copying and reusing existing task trackings in the overview.
With the timer, you'll have an easy tool to track your work hours in a straightforward and accessible manner. This does not only create accountability for yourself but also transparency towards your team.
Weekly View vs. Monthly View
There are two different views available for the timer, the weekly timeline and the monthly calendar view.
You can switch easily from the weekly view to the calendar view by clicking on the calendar icon in the top bar. If you're in the calendar view you can switch back to the weekly view by clicking on the similarly positioned clock icon.
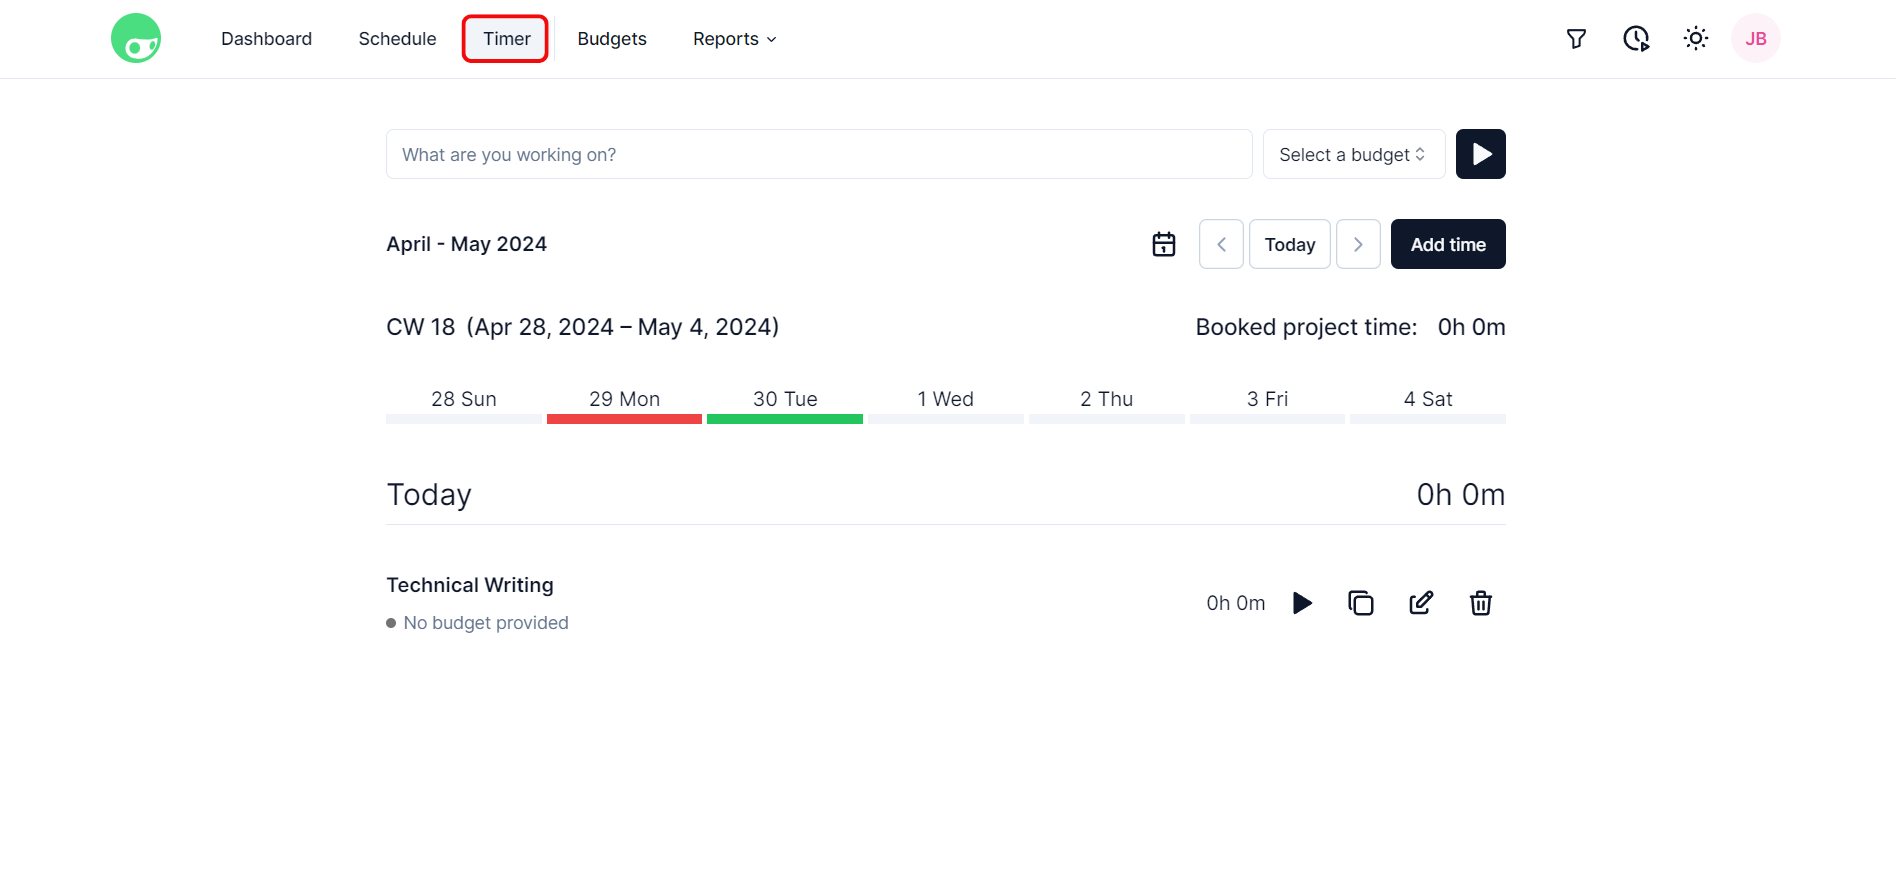
Weekly View
The weekly timer, which is the default view when opening the timer section, is set up in a weekly timeline starting with Sunday.
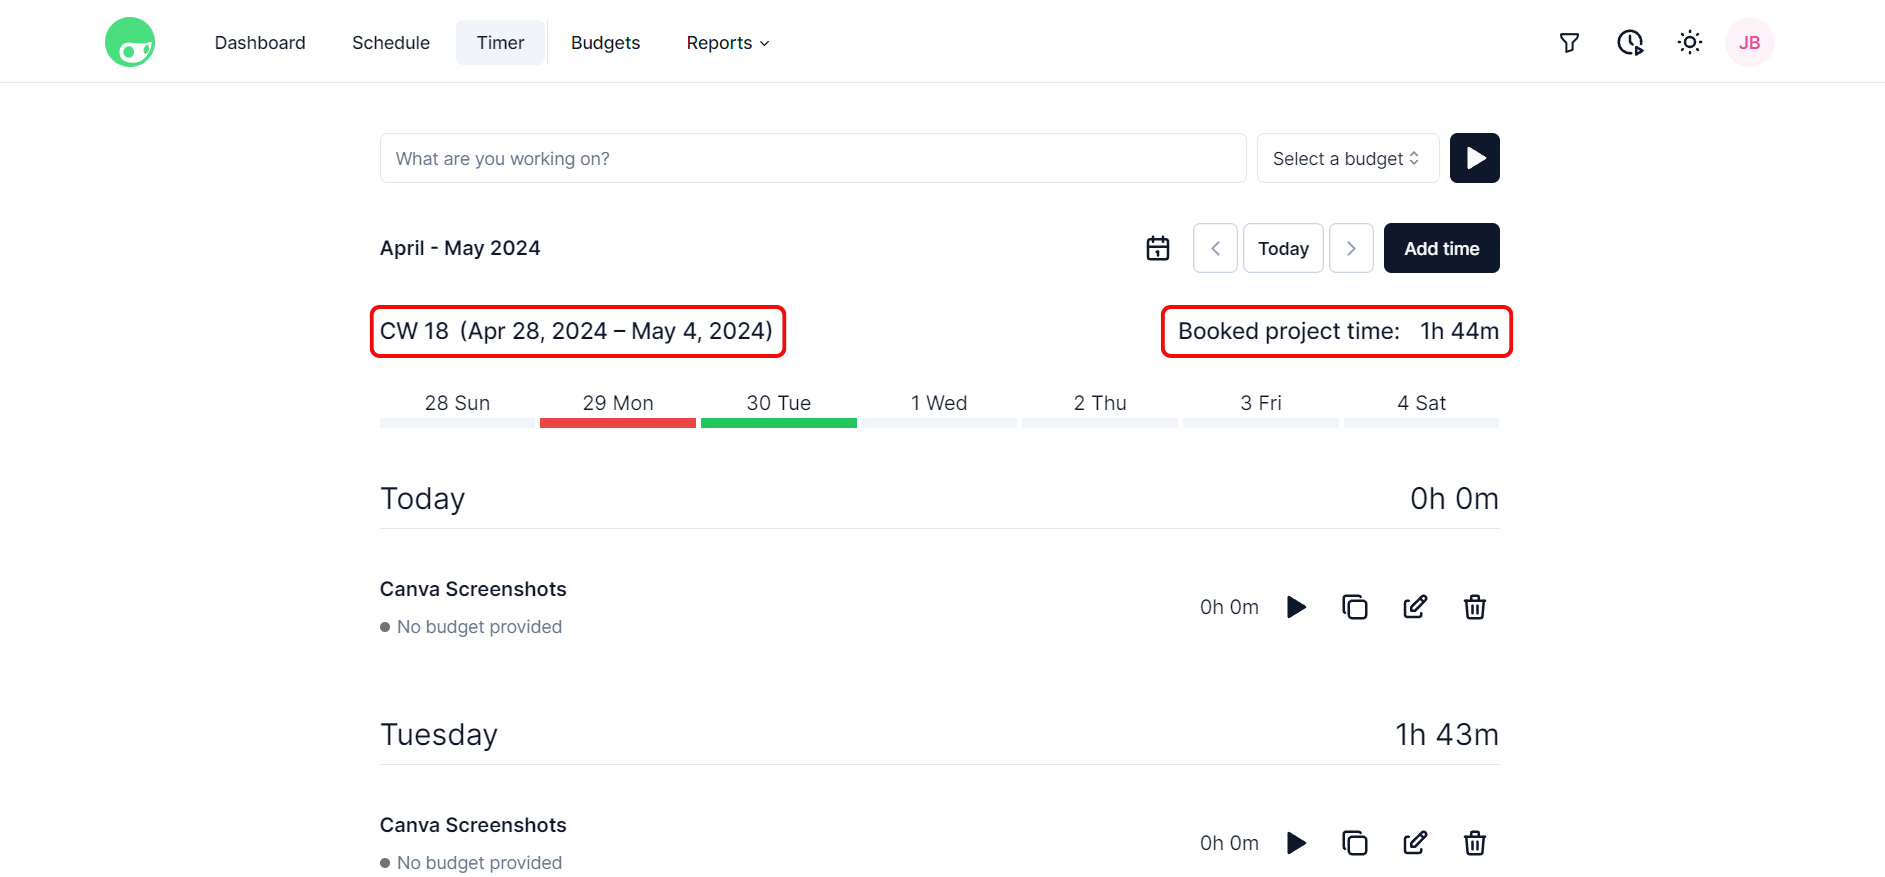
The current calendar week is denoted above the timeline on the left side. On the right side, you can see the sum of your currently tracked time bookings in the week.
Days lacking time bookings are marked red in the timeline. Days with successfully created time bookings are marked green. Days for which no time bookings are necessary, such as Sunday or Federal Holidays, are appearing greyed out. The same applies to days in the future.
Above the timeline, you can track time with a timer on the fly. Below the timeline, you can see an overview of all already created time bookings for the current week including a daily summary of your overall tracked time.
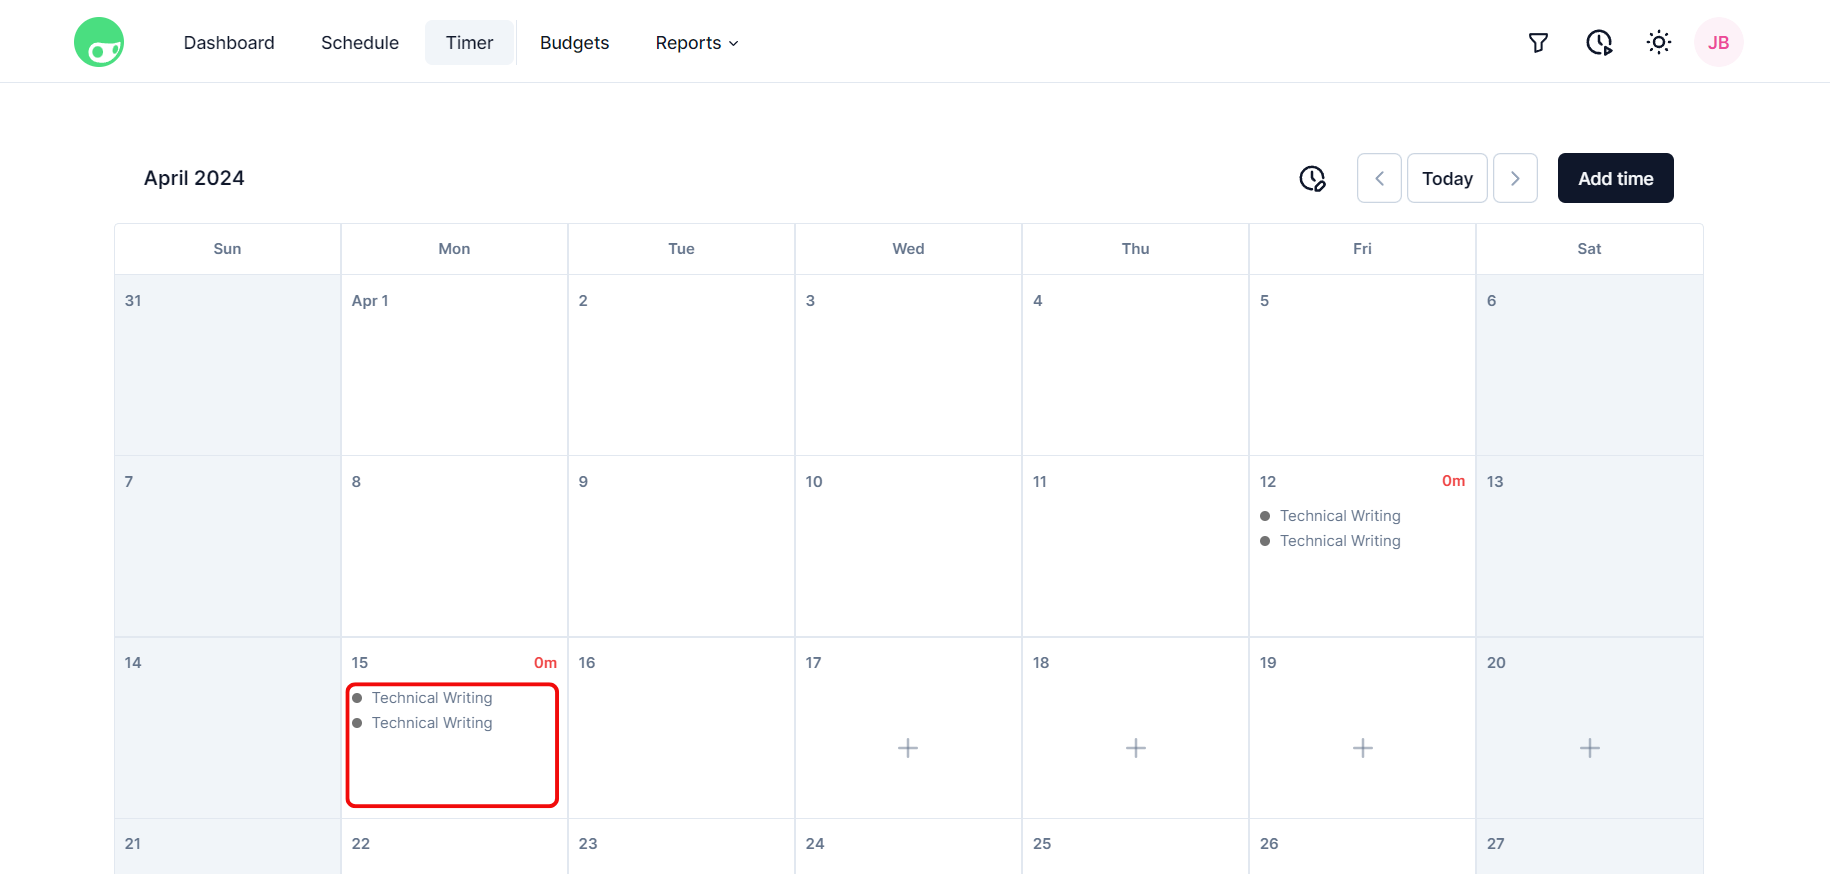
Monthly View
The monthly view lets you gain an overview of your tracked time bookings for the entire month.
By clicking on any day with created bookings you can open a detail widget showing more information about the bookings. Here, you can also edit or delete the bookings and add more, in case the days are within the active timeframe of the last two weeks.
While it is not possible to track time on the fly in the monthly calendar, you can add time bookings manually via the "Add" button in the top bar or by clicking on the plus icon in the calendar days.
Go Forward/Backward
You can go forward and backward in the timer by using the arrow buttons in the top bar. Clicking on the left arrow lets you go to the past week and clicking on the right arrow lets you go to the next week. The current week is always shown above the weekly timeline.
You can use a similar feature in the monthly calendar view to go to the next or the previous month. Here, the current month is shown above the calendar view.
In both views, you can click on "Today" to switch to the current week or month immediately with the current day marked in red.
Track Time Ad Hoc
In the weekly timer, it is possible to track your work times on the fly by using the timer feature at the top.
Tracking your work time like this is very easy. Just add a short description of the task or type of work you're doing, select a budget you're working on, if applicable, and press the play icon to start tracking time. If you've finished the task, press the stop icon to stop tracking time.
You can also speed up the process by selecting an already existing task from the dropdown menu of tasks you have already tracked before in the timer. This helps you to swiftly track repetitive work as you're usually doing similar tasks in your role over again.
The new time booking will appear in the "Today" section under the weekly timeline once you've finished tracking. You can also view the new booking in the monthly calendar.
Create Time Bookings Manually
Manual Bookings In The Weekly View
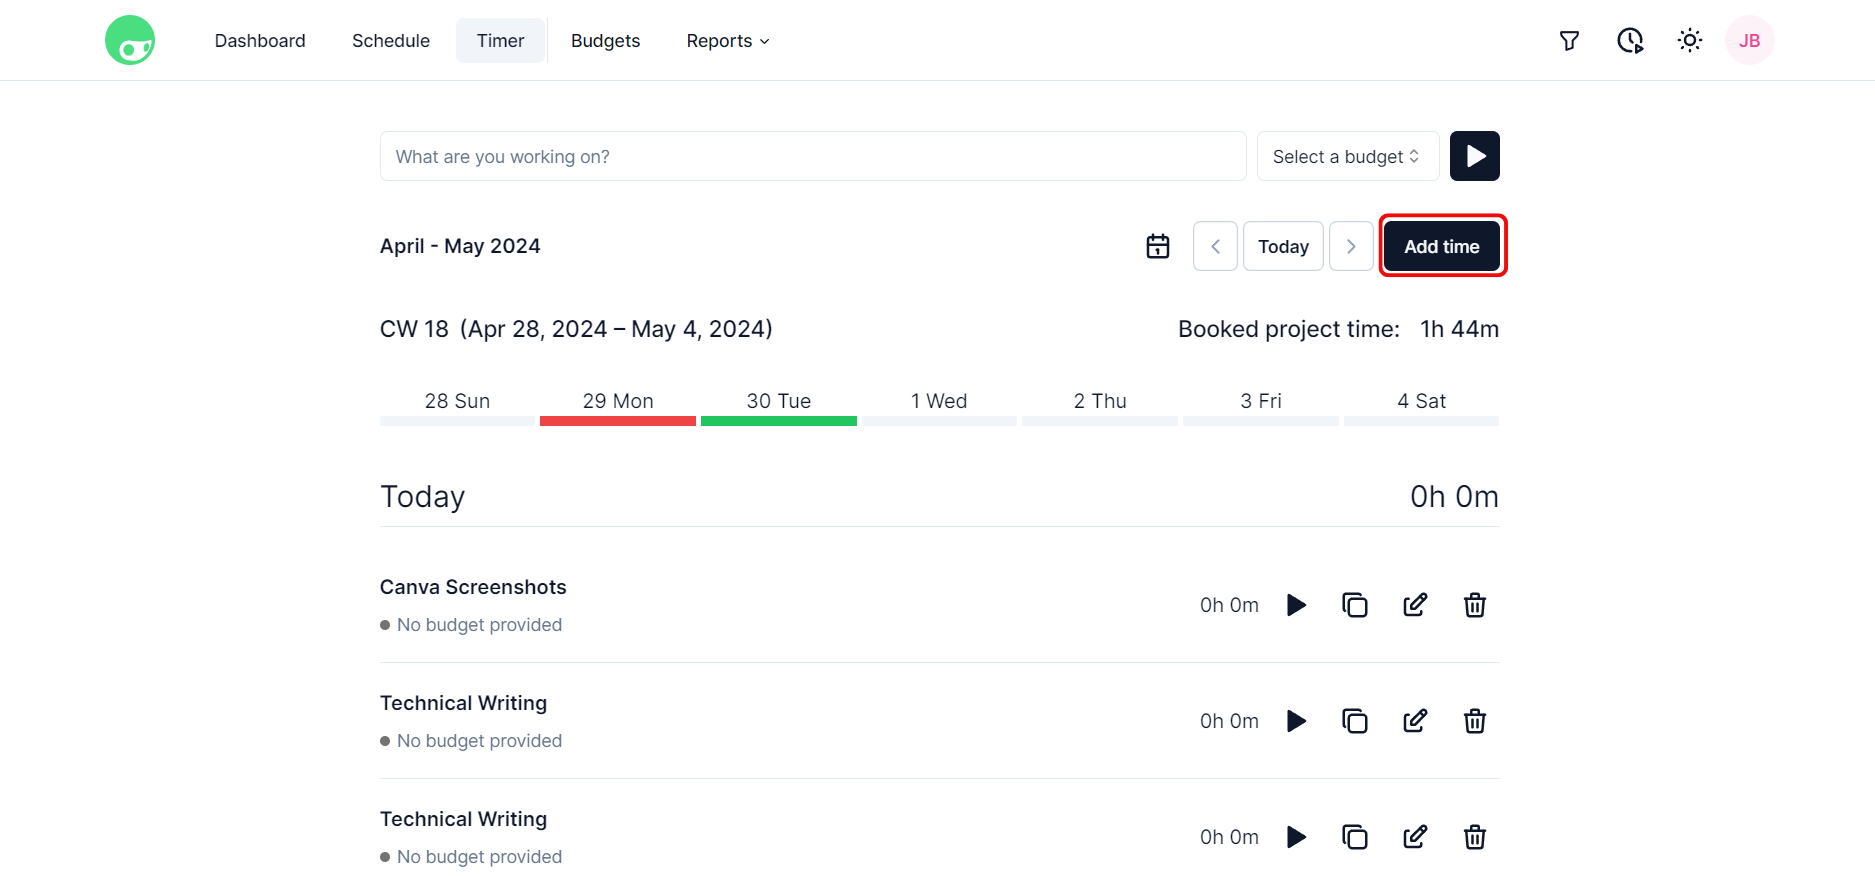
In the weekly view, you can also add new time bookings manually by clicking on the "Add" button in the top right corner of the weekly tracker.
A detail widget will be opened where you have to describe the work task you've done, select the budget you worked on and enter the amount of hours and minutes you've completed. The latter must be input in the format 2h 45m as an example.
You furthermore are prompted to pick the day of the booking via a calendar date picker. Here, it is also possible to select multiple days to track the task several times at once. This is useful if you just want to track your regular working hours (8h) per day for the week or if you already know in advance how long you will work every day.
You should know!
When manually creating a time booking, you cannot circumvent not choosing a budget you've worked on. To successfully track your time, select a budget from the dropdown menu in the detail widget.
Manual Bookings In The Monthly View
In the calendar view, you have several ways to create a time booking manually. You can use the "Add" button in the top right corner similar to the process in the weekly view. This will open the same widget and you can also create multiple bookings at once via a calendar date picker.
Additionally, you can click on the plus icon on any day in the calendar that has time tracking enabled to create a new booking. You can also click on a day with existing bookings and click on "Add More" at the bottom of the detail widget. This will open a new widget where you can configure another booking for the day.
You will be provided with a weekly date picker so that you also can create multiple bookings at once for multiple days.
Use Preexisting Trackers
Once you have created a booking, you can freely reuse, copy, edit or delete it, granting you a flexible set of actions to work with already existing tasks and bookings in your overview. This helps you save time and prevents you from having to recreate trackers for the same tasks.
If you want to track time for a repeated task, just work with the bookings already available to you in the weekly overview. Just click on the play icon beside the task and a new tracker will start in the top bar. Once you have finished working, click on the stop icon and the booking will be added to the overview.
Copy Existing Tracker
In addition to reusing existing trackers, you can also replicate trackers by copying them. This is how you can use an existing booking as a template to create new ones. This is useful for tasks that might derivate slightly from tasks you have already tracked.
While copying the booking, you can also track it for multiple days at once directly in the copy widget.
Edit Existing Tracker
To edit an existing tracker, click on the pen icon beside the booking in the overview. Alternatively, open the monthly view, click on the day the booking was created and click on the pen icon in the detail widget beside the tracker you want to edit.
You can edit anything from the name of the tracker to the amount of time tracked to the associated budget and the day the booking has been done. The edited time will count as manually tracked time.
Delete Existing Tracker
To delete an existing tracker simply click on the bin icon beside the booking and confirm by clicking on "Delete".
In the monthly view, you can delete bookings by clicking on the day the booking was created and clicking on the bin icon beside the booking in the detail widget. Here as well you have to confirm your action by clicking on "Delete".